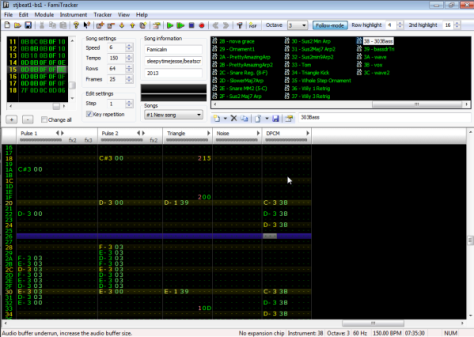
You probably heard me mention before how much I love the Sunsoft DPCM bass trick on the NES. Of all the chiptune composers, Sunfsoft’s people really set the bar high with this trick. Although it does muddy things up a little bit, the crunchy bass lines on a handful of these old NES games really stood out. Today we’ll take a look at how to build some slick DPCM bass lines in Famitracker with minimal fuss and hopefully minimal static in the final product.
Read on to find out how we get this sound out of 8-bit samples..
Normally the DPCM channel plays drum samples but there’s nothing that says you can’t use it for other things. Vocal samples and bass notes are some of the best options. We’ll look at how to take your non-Famitracker sample from a WAV file into a DMC and loading it into Famitracker. You’ll be surprised at how awesome it sounds when you’re done.
Build Your Samples
The great thing about this method is that you can bring in your source material from basically anywhere
Things that convert well:
- FM Synthesis Bass Notes
- TB-303 Bass Notes
- Simple Chiptune Sounds (from other platforms for example)
- Standard 80’s Synths
Things that convert less well:
- Highly Distorted Sounds
- Sounds with tons of Reverb
- Very Quiet Sounds
- High-Pitched Sounds
- Layered sounds (drums,bass, strings, full song audio)
Using any non-bass sounds tend to add high levels of screechy bit crushed static that aren’t usually what you want in a song.
Once you’ve settled on a sound, the next part is to figure out what notes you need and bounce each one to a WAV file. You can load tons of DMC sample files into Famitracker, butif you kind of already have an idea in mind, you can bounce just the notes you need and then use the other slots for drum samples or voices or anything else you might want.

Here’s a few tips:
- Keep your headspace to a minimum, your samples should be compressed and peaking near -0.03dB. Quiet samples seem to fill up with more static once converted to dmc.
- Cut unneeded frequencies. Brick wall filter out < 30hz and and higher frequencies you can remove without hurting the sound or character of your sample.
- Keep them short. The NES only has memory to play about 1 second at a time. Longer samples will just stop playing after a second.
- Name your files for the notes that they are, it’ll help you line them up
- You can make looping sounds but its better to make short clips with short trails that terminate in silence.
- Avoid long trails, they turn into swells of static

When you are ready to export/bounce, use 8-bit Mono. Depending on the converter you’re using, you’ll need them in 44khz or 33.144khz. Since 33114hz is a weird one, you might need to convert them using a third-party program (most DAWs don’t do it). A good one is Voxengo convertor.
Convert Your Samples to DMC Files

I like RJDMC since it has a nice windows interface and lets you preview the sound. You can use this one from Nullsleep for a command line interface. In the end move your dmc format files to the directory where you store your Famitracker files.
Load DMC Files into Famitracker
Make a new instrument and go over to the DPCM tab.

The best thing to do is put them on the right octaves and the right notes, but you don’t have to. You don’t have to just use single notes, you can do bending notes or anything you want in your samples, its best to decide on a tempo first.
Build Your DPCM Track
Select your instrument and lay down your notes. Some samples take a second or two longer to play, so you might want to put them a little bit earlier.

Making Drums With Noise and Triangle
Now you have your triangle and noise channel free for making drums. You can get a decent bass sound out of the triangle by using short notes with the 2## effect. I suggest 209 for a nice punchy bass kick sound.

In the example video at the bottom, we use a raw Triangle instrument (no settings or steps in the instrument window) and the effect 2 which is slide down note at speed of 30 to get that Megaman style sloping bass that really cuts thru the mix. You only need to set it once and then it will continue to work on each note.
The noise channel doubles up as the hi-hat and snare. I prefer to change the noise to make the snare manually in the volume channel and then copy it as needed. It sounds smoother than volume steps in the instrument window. We do use the instrument for the hi-hat though, so here’s the settings:


an intelligent interface, excellent audio quality